Console Accessing Using puTTY (Windows)

What is puTTY?

puTTY is a tool used in Windows that gives users the ability to easily connect to other devices. While these connections can be done in the command line of Windows, puTTY gives a single location with a basic UI for users to follow. In our labs, you will use puTTY for SSH and Console connections. However, puTTY has abilities beyond this, including (but not limited to) telnet connections.
You can download puTTY here: https://www.chiark.greenend.org.uk/~sgtatham/putty/latest.html
(We recommend the 32-bit release to be safe. puTTY comes with an easy-to-use installer)


puTTY UI and SSH

After you install puTTY and start it up, you should see a UI (user interface) that looks something like this:
For our purposes, you will not be using any options on the left side of the screen.
At the top of the puTTY page, you see a field for “Host Name (or IP address)”. This field is where you input the location you are trying to connect to. Below that, you select the connection type. For example, if I wanted to SSH into a server on my network at 192.168.10.100, my window would look similar to the following:
To start the connection, press the “Open” button at the bottom of the screen.


Console Connections

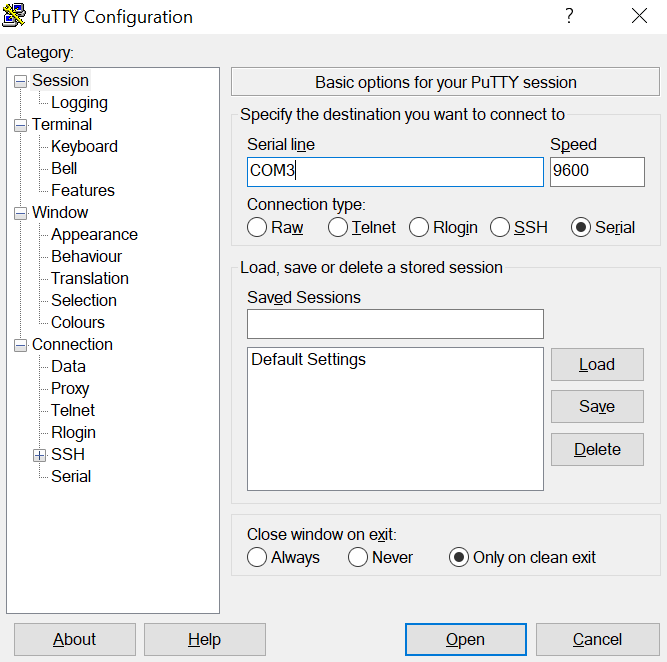
Console connections in puTTY are slightly more complicated. After clicking on the serial option, you are asked for a “Serial line” with the default value “COM1”. COM1 on a Windows machine corresponds to a specific port on your machine. When using the serial-to-usb converter, you should connect the serial cable (the light blue one) to the converter, the serial plug into the router/switch, then usb port into your laptop/computer.
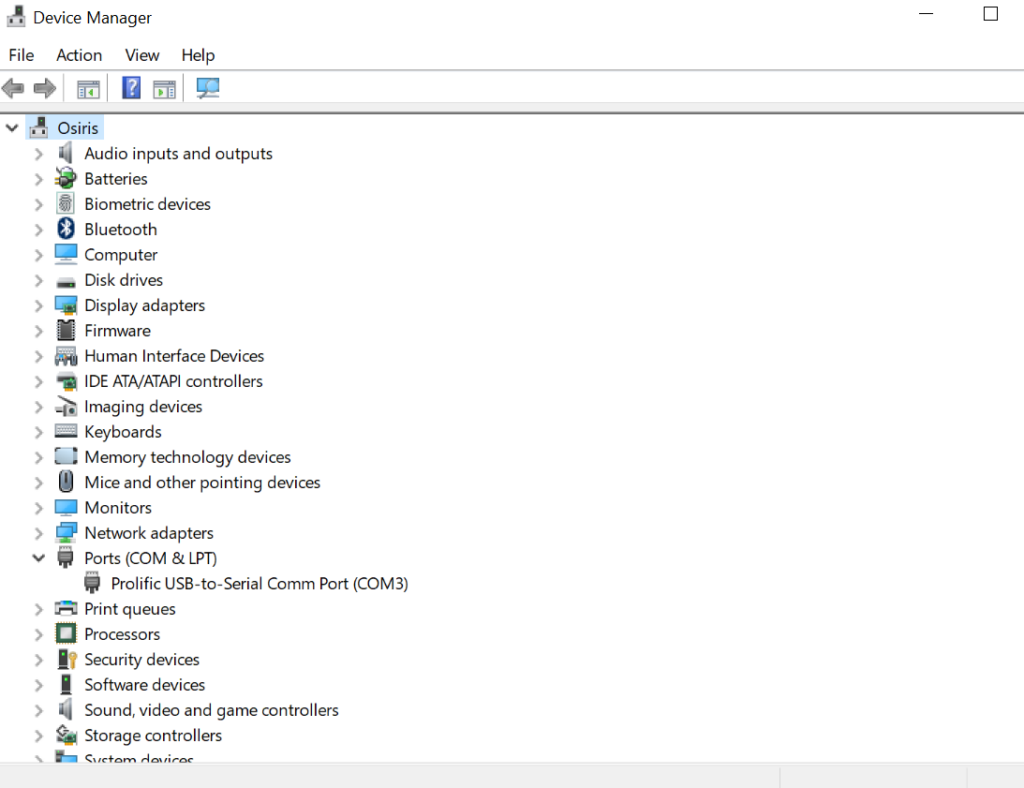
To figure out which COM port you are using, open Device Manager. On Windows 10, you can do this by clicking the Windows button and searching for “Device Manager”. The process should be similar if not identical on other Windows machines. Something like this should pop up:
After this window appears, click on the small right facing arrow next to “Ports (COM & LPT)”. (Note that this was already done in the image above) You should see a device come up with “USB-to-Serial” listed and the COM number after it. In the example image, my USB-to-Serial cable is plugged into COM3.
To connect using that cord in puTTY, change the default COM value to the one you just found. Make sure your speed stays default (9600). Mine looks like so
Once again, click “Open” button at the bottom of the page to start the connection.